Importing Vehicles
Step-by-step instructions for importing a functional 3D car vehicle into dverso, our web-based metaverse. The process involves preparing the 3D model in Blender, exporting it as a .glb file, and importing it into dverso with specific configurations.
Prerequisites
- Blender installed on your computer
- dverso account
Step 1: Prepare 3D Model in Blender
1.1 Open Blender
Launch Blender on your computer.
1.2 Load 3D Car Model
Load the 3D car model you want to import in dverso.
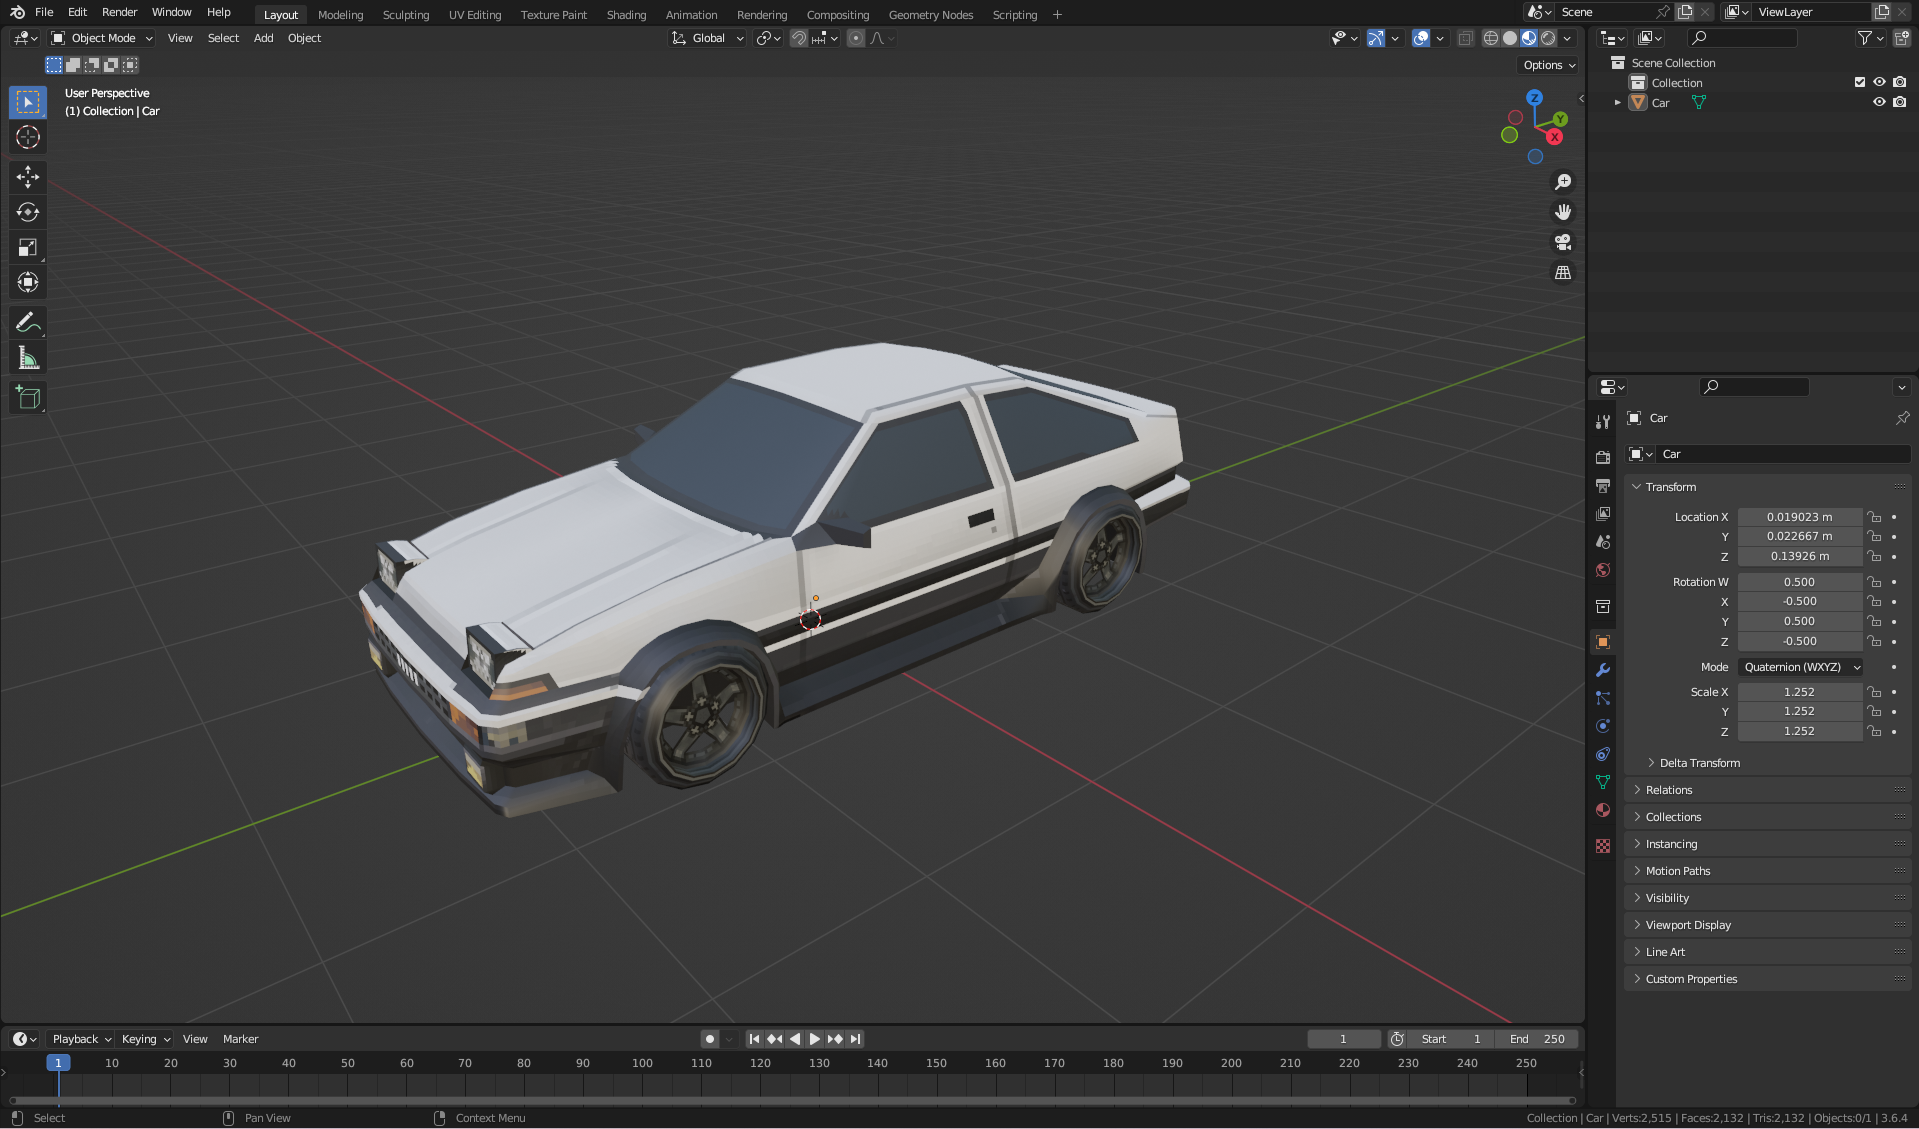
1.3 Separate Chassis and Wheels
Use Blender's "Separate" to split the 3D car model into the chassis and individual wheels by selecting the desired mesh in edit mode and pressing [P]
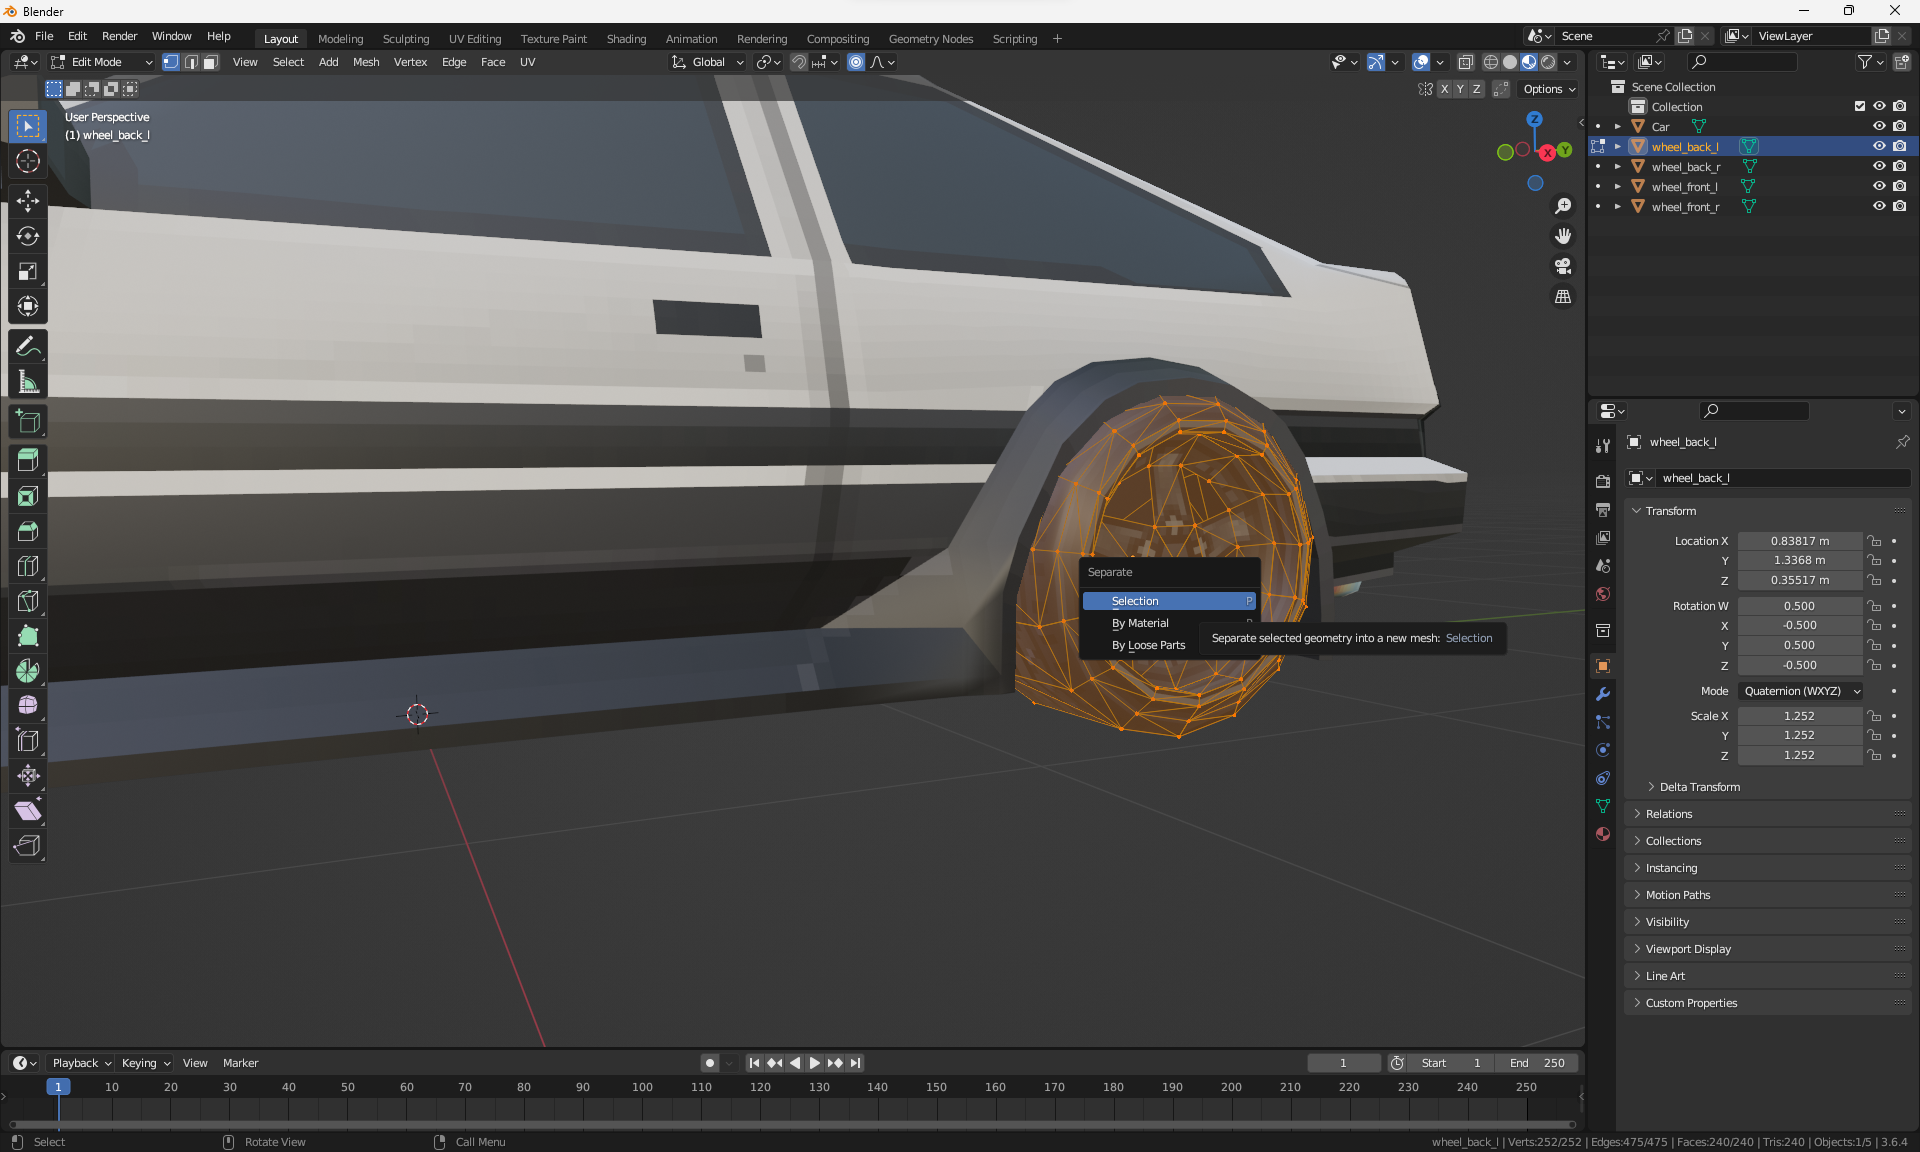
1.4 Name Wheels
Name each wheel object and the chassis according to the following convention:
"chassis, wheel_back_l, wheel_back_r, wheel_front_l, wheel_front_r"
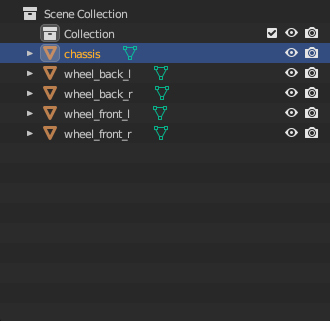
1.5 Set Origin
Set the origin of the chassis to the bottom center of the chassis.
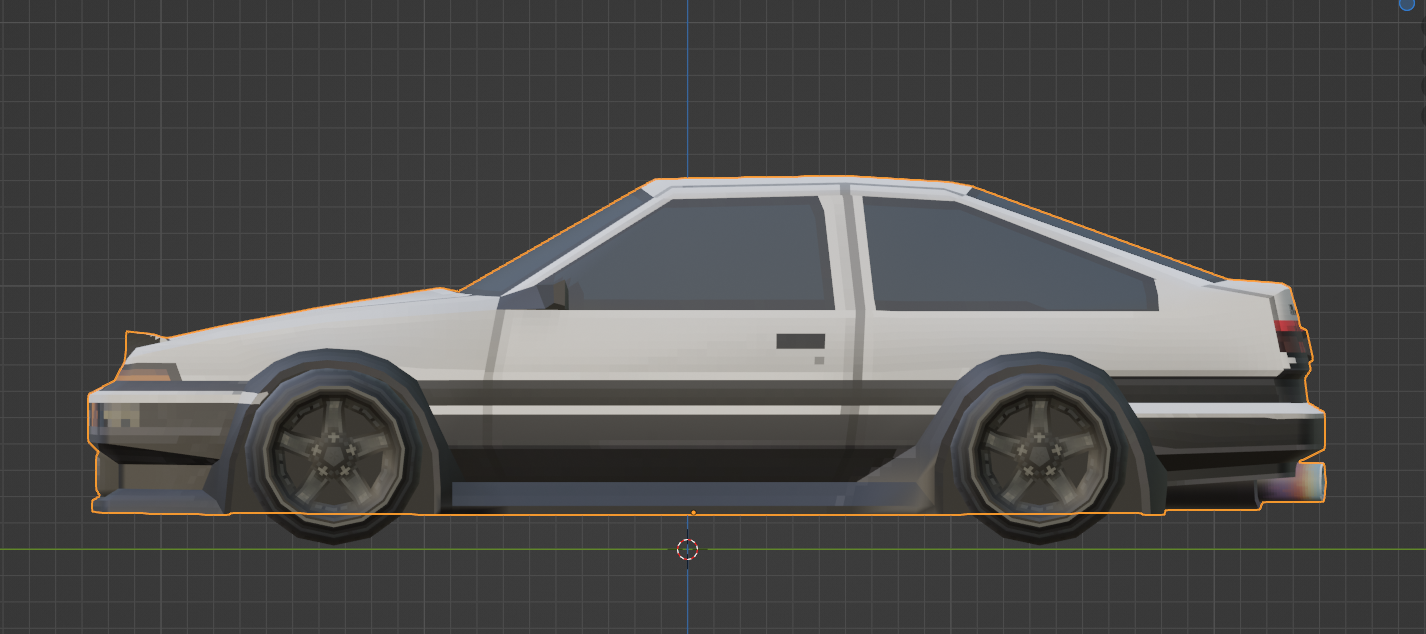
For each wheel, set the origin to the center of mass (volume) by Object > Set Origin > Origin to Center of Mass (Volume).

1.6 Save Blender File
Save your Blender project file!
Step 2: Export as glb
2.1 Export Settings
Choose File > Export > GLB (.glb)
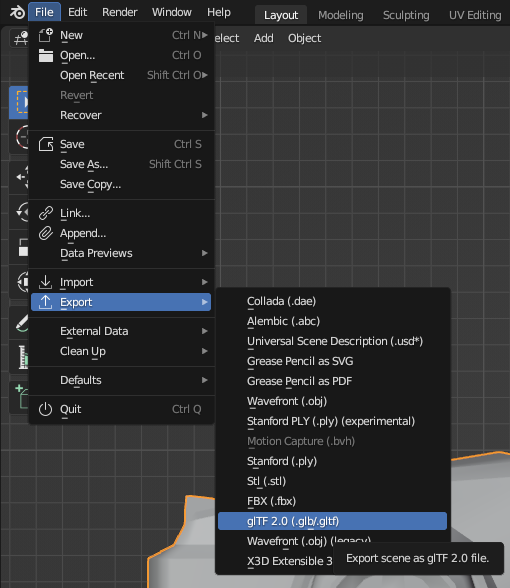
2.2 Save GLB File
Specify a location to save the exported .glb file and click "Export GLB."
Step 3: Importing into dverso
3.1 Access dverso
Open your web browser and navigate to the dverso platform. Log in to your dverso account and enter one of your maps.
3.2 Import the asset
Click on the + icon in the library while pressing shift to import the uncompressed .glb file in editor mode.
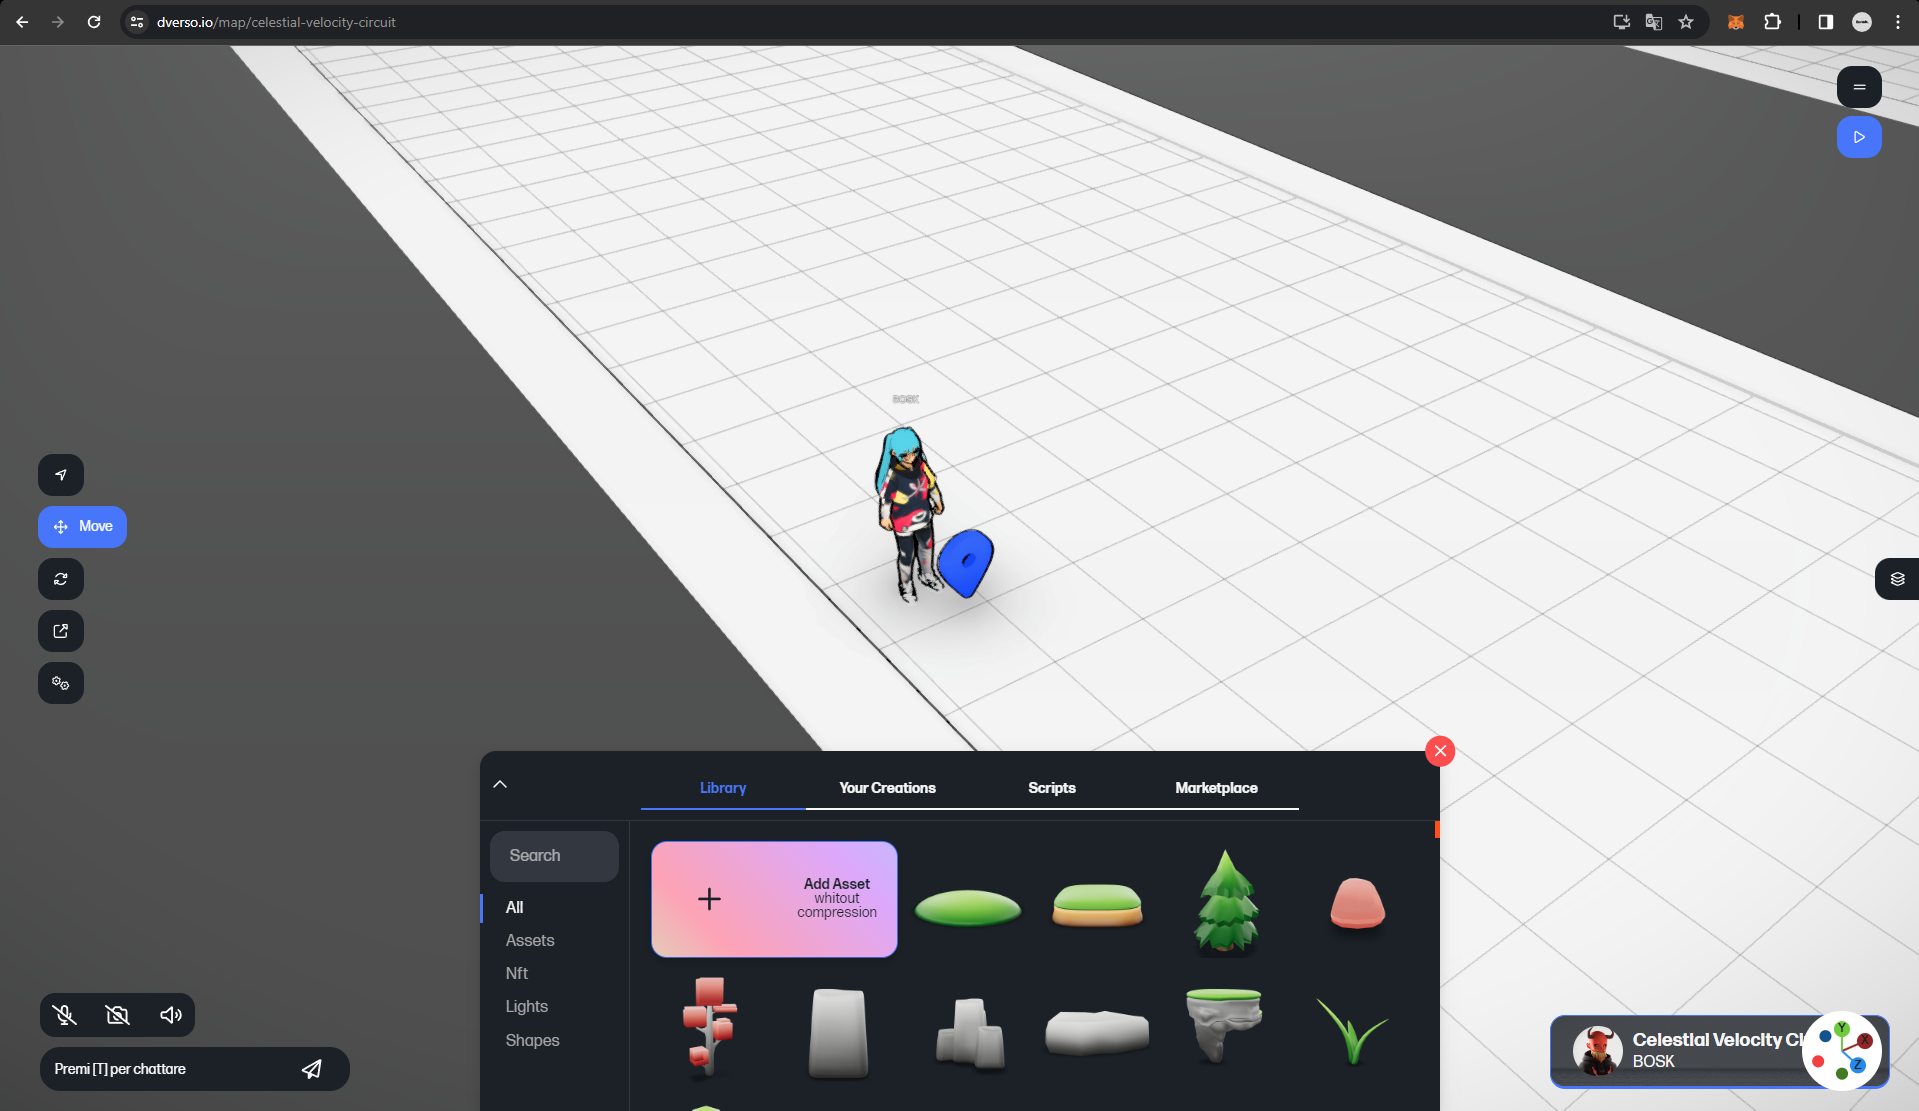
Not doing so will result in the car being compressed and not working properly
3.3 Right-Click Configuration
Once the asset is imported, right-click on the imported 3D car model in your creations to access the context menu.
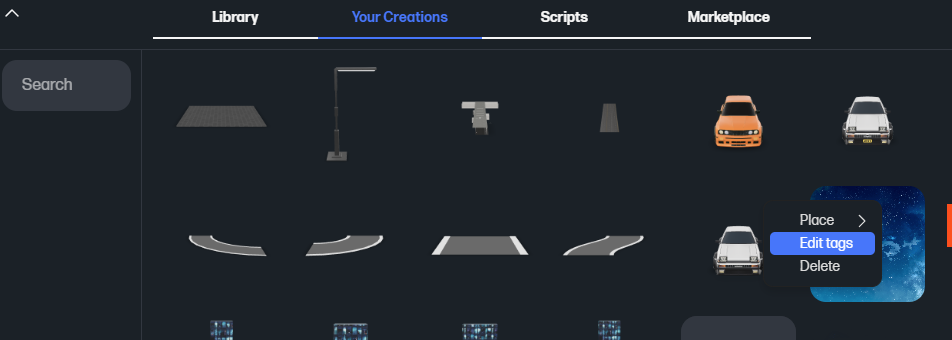
3.4 Add Tag
Select "Edit Tag" from the menu and add the tag "vehicle" to the imported asset.
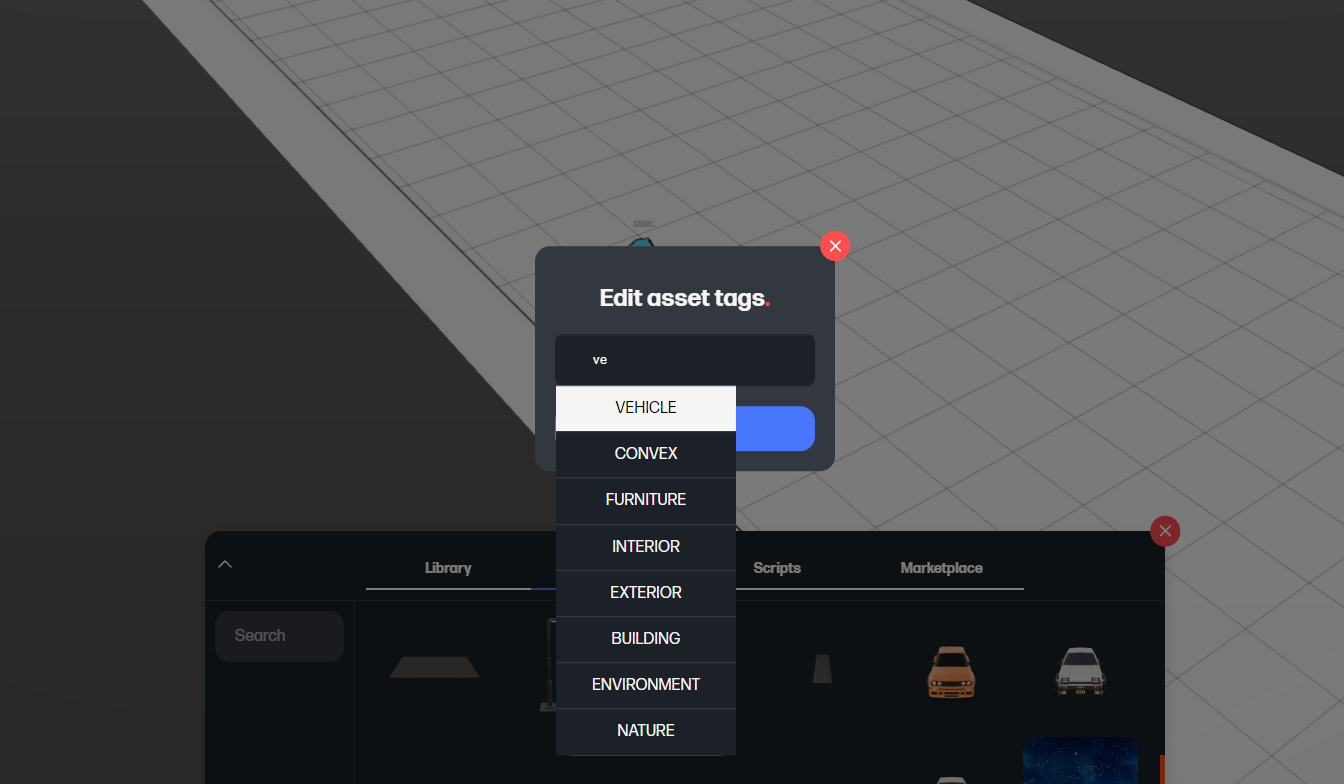
Conclusion
Your 3D car model is now successfully imported into dverso as a vehicle asset. You can use it within your metaverse.